How to Paint an RV
Learn how to paint your Home On Wheels
If your heart is set on traveling as much as possible, chances are you bought an RV years ago. Over time, your home on wheels has started to show its age. And now you long for when it looked shiny and new. Or, in a different case, you bought a secondhand RV to fulfill your longtime dream and it needs attention to its paint.
An RV is more like a second home. So, just like your home you want to keep it looking great. It doesn't take much to keep that motorhome looking nice.
A fresh coat of the right paint (such as waterproof paint for metal) applied with care can bring back that shiny, new feeling. And you get to start traveling in style in no time.
Here’s how to paint an RV exterior.
Things You Will Need
- Soap
- Water hose
- long handle scrub brush
- Towels
- Exterior paint for metal, aluminum or fiberglass
- oil-based turpentine paint primer
- Painters tape
- Newspaper
- Paint sprayer brushes
How to Paint an RV Exterior
Step 1
Check with your RV manufacturer to determine what material the body of your RV is made of. Some RV bodies are constructed of aluminum cladding, while others are made of another type of metal or fiberglass.
Step 2
Select the correct type of exterior paint for the your RV. Once you choose a color. For best results, you'll want to use paint from the same paint manufacturer.
For aluminum surfaces, you want to use acrylic latex paint, specifically formulated for the aluminum surface. If you opt only for a latex paint not formulated for aluminum, it will react with the metal and will flake off over time.
For fiberglass, a good acrylic paint will get the job done.
Make sure that the paint you choose, regardless of the surface, is formulated for outdoor use. Paints formulated for indoor use will not stand up to the weather.
Step 3
Before you start painting your RV, Check your local weather report for the next couple of days. Of course, you don't want to try to paint your trailer outside in the pouring rain. High winds can kick up dust and debris that will stick to your new paint job. Extremely hot or cold temperatures will ruin the paint job, too. Try to choose a calm day between 50 and 80 degrees and park your trailer in a shady spot.
Step 4
Wash the trailer thoroughly by spraying it down with a hose and scrubbing with a soapy brush. Remove all dust, dirt, and grime. Rinse with water and use disposable towels to dry the entire trailer.
Step 5
Tape newspaper so that it covers the trailer windows and door frames. All you need is to tape over the frames to protect them. Newspaper and Painters tape will protect them from paint over spray.
Step 6
Mix the oil-based primer paint with the turpentine to make it thinner. Thin the primer to approximately 50 percent strength. Mix the required amount well and put it in a Paint sprayer.
Apply the primer with the sprayer. And you can use a tiny paintbrush for detail work around the edges of the windows and door frames, as well as corners. Let the primer dry for at least 24 hours, but no more than 48 hours before painting.
Step 7
Paint away. A paint sprayer will give you good coverage. Use contrast paint for small details.
Give the paint a full day to dry and then add a second coat of paint to complete your project. Check the paint container for instructions on how long the paint should be allowed to dry.
The exterior maintenance of an RV
Here are some tips on keeping the exterior of your RV looking great.
- Like any vehicle, paint with the passage of time and exposure to ultraviolet light can dull the shine. restoring the shine is simple. Using a polish that is formulated for the paint that you used will restore the initial shine.
- It is better to use an Electric Polisher because it is very labor intensive doing the polishing by hand. The process is simple. The polishing paste is poured into the "beret" of the polisher. And the product is spread. The machine is started at a few revolutions, and it begins to polish, doing it in a circle.
- It should be done in sections, not trying to cover the entire surface. Once the shine is achieved, a cloth that does not leave residues should be used to remove the excess paste. And once the process is finished, clean and wax and voila, you have a new RV.
- If the bumpers are painted in body color, the same process can be applied. If they are black and have become gray, you can use rejuvenating products.
- To maintain your paint job you should wax your RV every 6 months, again make sure you use a quality wax that is formulated for the pain you used.
- Also, pay attention to the stickers, polishing can damage them.
Conclusion
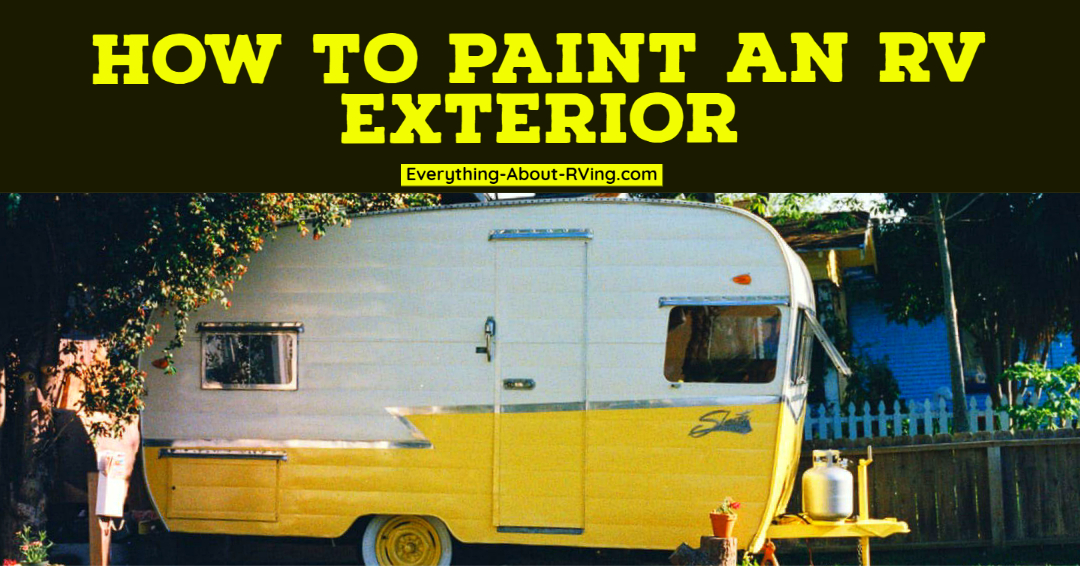
A little advice: Get jazzy. Paint your trailer with stripes and designs, just like the Travel Trailer in the photo.at the top of this page.
Do you have any suggestions or comments on this topic? You can add them to this page by using the comments section located below.


