- Home Page
- RVing Tips & Tricks
- How to Inspect and Repair Your Rvs Roof
How to Inspect and Repair Your RVs Roof Before Winter Storage

Winter is coming, and it's time to prepare your beloved RV for its seasonal hibernation. One of the most crucial steps in pre-winter preparation or "winterizing an RV" is to inspect and repair your RVs roof. This comprehensive guide will walk you through "how to inspect and repair your RVs roof before storing it for the winter."
Why You Need to Inspect and Repair Your RVs Roof
Your RV's roof takes a lot of beating from the elements, so regular inspection and maintenance are essential. Failure to do so can lead to leaks and other significant issues, damaging your RV's interior and potentially costing you a lot of money.
Preparation for RV Roof Inspection

Before you start the inspection, clear any debris from your RV roof. This includes leaves, twigs, and dirt that could hide potential damage points. It's also a good idea to give the whole thing a good scrub with an RV-friendly cleaning solution to reveal any less obvious issues.
Your RV's roof may have a soft spot, a common issue caused by water damage. These are usually not visible to the untrained eye, but you can feel them by walking on the roof. Watch out for this as you move around during the cleaning process.
How to Inspect and Repair Your RVs Roof Guide
Once your roof is clean and dry, start inspecting it.
Look out for cracks or breaches on the roof itself and around fixtures like
vents, skylights, and air conditioning units. You may notice some cracks that
are not major issues but keep an eye on them for future reference.
The roof sealant is one spot that needs attention during your RV roof inspection. Over time, the sealant may wear out, leaving your roof at risk of leaks. Examine the sealant carefully around all the edges and fixtures. If you notice any areas where it is missing or worn, you will have to replace it.
If you find any significant cracks or breaches, it is
vital to address them immediately before they cause more substantial damage.
Smaller cracks can usually be sealed using an RV roof sealant, which is an
easy-to-apply solution that creates a firm, waterproof barrier.
Larger ruptures or breaches, however, may require more extensive repairs. In some cases, you may need to replace an entire section of the RV roof. If you're handy, you might be able to handle this yourself. If not, hiring a professional is important to ensure the job is done correctly.
Also, pay attention to the hardware on your RV roof, like the air conditioner, satellite dish, and antenna. They must also be secure and sealed correctly to prevent water from leaking into your RV. Check them for any signs of damage or wear and repair or replace them as needed.
If you do find cracks around the base of your Air Conditioner, Satellite Dish, Antennas, etc. You can use products like ETERNABOND Sealing Tape to easily reseal them and prevent them from leaking and causing damage to your RV.
Watch the video below to learn more about ETERNABOND Sealing Tape:

It might be easy to overlook, but checking and cleaning
your RV's gutters is also a significant step. Clogged or damaged gutters can
create standing water on your RV's roof, which can lead to damage over time.
If you have any slide-outs on your RV, make sure to inspect their roofs and seals as they can become worn over time, allowing water to leak into your RV, which could cause significant damage.
Now that your RV roof has been thoroughly inspected and any necessary repairs have been made, it's time to protect it from the harsh winter weather.
Consider investing in an RV cover if you don't already have one. An appropriate cover can protect your RV's roof from the damaging effects of snow, ice, and freezing temperatures, extending the life of your RV roof.

Another essential step for winterizing a rubber RV roof is
applying a rubber roof protectant. This type of treatment can help further protect
your roof from heavy snow and ice and can also help reflect UV rays, which can
damage your RV over time.
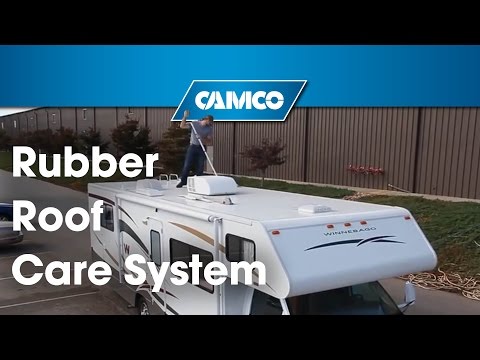
Watch the video below to learn about one of the most popular RV Roof Protectant Camco's Pro-Tec RV Rubber Roof Care System.
For some great videos on RVing and the RV Lifestyle, visit the
Everything About RVing YouTube Channel
Before applying the coating, you need to make sure that
the roof is dry and free from dirt or debris. Follow the manufacturer's
instructions for application using the recommended tools.
Remember, it's crucial to check the weather forecast before you apply the protective coating. Doing so in rainy or freezing weather would be counterproductive, as the coating needs time to dry and set.
Coating your RV's roof may need to be done annually, depending on the current conditions and what type of protective coating you use.
As you can see, inspecting and repairing your RV's roof is not necessarily a complex process. However, it does require a thorough and systematic approach.
But remember, if in doubt, don't hesitate to call in the professionals. Proper maintenance of your RV roof is an investment in your RV's longevity and can save you a significant amount in potential repairs down the line.
Inspecting and repairing your RV's roof truly is one of the most important steps in winterizing your RV. It's also a critical routine maintenance task that can help you extend your RV's life for many seasons
Conclusion
In summary, make sure to remove any debris, inspect for damage, repair where required, and protect with a suitable cover and protective coating before winter sets in. You'll be grateful for the effort when you uncover a well-preserved RV ready for next season's adventures.
Hopefully, this guide has given you some valuable tips on how to inspect and repair your RVs roof before storing it for the winter. If you can embrace the maintenance as part of your RV ownership journey, you'll find your home-on-wheels will be ready to roll when the spring comes around, no matter what the winter throws at it.
FAQ
How to Inspect and Repair Your RVs Roof
What is the importance of inspecting and repairing the RV's roof before winter storage?
What is the importance of inspecting and repairing the RV's roof before winter storage?
Inspecting and repairing your RV's roof before winter storage prevents leaks and other significant issues, protects the RV's interior, and can save you money on potential costly repairs.
What is the recommended initial step before inspecting the RV's roof?
What is the recommended initial step before inspecting the RV's roof?
Before starting the inspection, clear any debris like leaves, twigs, and dirt from the RV roof and give it a thorough scrub with an RV-friendly cleaning solution to reveal any hidden issues.
How can one detect soft spots caused by water damage on the RV's roof?
How can one detect soft spots caused by water damage on the RV's roof?
Soft spots due to water damage are typically not visible but can be felt by walking on the roof. These areas might feel softer or less sturdy compared to the surrounding roofing.
What should one do if they discover worn or missing sealant around the roof's edges and fixtures?
What should one do if they discover worn or missing sealant around the roof's edges and fixtures?
If the sealant is worn out or missing around edges and fixtures, it needs to be replaced to prevent leaks and potential water damage.
What measures can be taken to protect the RV's roof during the winter months?
What measures can be taken to protect the RV's roof during the winter months?
To protect the RV's roof during winter, consider investing in an RV cover and applying a protective coating that guards against snow, ice, and damaging UV rays. Ensure the roof is dry and clean before application and check the weather forecast to avoid rainy or freezing conditions during application.
You might like these
7 Tips for Summer Boondocking in Your RV
These 7 tips for summer boondocking in your RV will get you ready for your summer RV boondocking Adventure.
Mastering the Art of Cooking in Your RV Kitchen
I will provide some helpful tips and tricks for Mastering the Art of Cooking in Your RV Kitchen so that you can enjoy delicious meals while on the road.
Maximizing Space in Your RV: Organization Hacks and Storage Solutions
We'll explore various organizational hacks for maximizing space in your RV.
Eco Friendly RVing: Tips on Reducing Your Carbon Footprint on the Road
These Eco Friendly RVing tips will help you reduce your carbon footprint while RVing

Comments
Do you have a comment on this topic? You can leave your comment in the box below.